Overview
TopTeam App Distribution Website is required for facilitating automatic distribution of TopTeam App to TopTeam users in your organization. TopTeam App Launcher requires this website for downloading and installing TopTeam App on each user’s computer.
This article explains the steps for setting up a website for TopTeam App distribution on TopTeam Web Server.
Who should read this?
- TopTeam Administrators
- Windows Administrators
- IT Support
Preparations
- Login to the server computer where TopTeam Web Server is installed.
- Download TopTeamAppDownloadsSetup.zip to the server computer.
The setup file name format is: TopTeamAppDownloadsSetup.zip
Step 1. Extract TopTeamAppDownloadsSetup.zip file contents into a “TechnoSolutions/TopTeamAppDownloadsSetup” folder
Step 2. Open Internet Information Services (IIS) and go to Application Pools
Step 3. Right-click Application Pools and click Add Application Pool…
Step 4. Add an Application Pool for topteamAppDownloads by entering the required details
Step 5. Select the newly added Application Pool and click Advanced Settings…
Step 6. Set Identity
Step 6.1. Choose Built-in account
Alternately, you can also choose the Custom account option to use your own account.
NOTE: It is recommended to change Application Pool Identity to the User Account that has read permissions on the installation folder of TopTeamAppDownloadsSetup on TopTeam Web Server.
Step 6.2. Select Local System
Step 7. Set Maximum Worker Processes value
NOTE: Recommended value for Maximum Worker Processes is 2 to 4 worker processes.
Step 8. Go to website of TopTeam Web
NOTE: If you do not have an existing website for TopTeam Web Server, it is then recommended to create a new website for TopTeam App distribution and then continue with this step.
Step 9. Add a new application for TopTeamAppDownloads
Step 9.1. Enter topteamAppDownloads in the Alias field and specify its Physical Path
Step 9.2. Browse and select the folder where setup contents were extracted
Step 9.3. Specify Application Pool
Step 9.4. Select the newly created Application Pool
Step 9.5. Click OK to add application
New application is added
Step 10. Set Authentication of the newly created application
Step 10.1. Select Anonymous Authentication and click Edit…
Step 10.2. Choose Application pool identity
Step 11. Add custom HTTP Response Header
Step 11.1. Right-click area under HTTP Response Headers and select Add…
Step 11.2. Enter Name and Value
Enter details as shown below:
- Name: cache-control
- Value: no-cache
Step 12. Download TopTeamAutoUpdatePackage.zip for Desktop App
Download TopTeamAutoUpdatePkg.zip file for Desktop App from TechnoSolutions Customer Portal (access to Customer Portal is available only to licensed customers) or the link provided to you by TechnoSolutions sales/support department.
.e.g. TopTeamAutoUpdatePkg_DesktopApp_Adv_9.603_MinDB9.0_31May16.zip
The file name format is: TopTeamAutoUpdatePkg_DesktopApp_Adv_<TopTeam Desktop App Version>_MinDB<TopTeam Database Schema Version Required>_<Release Date>.zip
In the example above:
- 9.603 – is the version number of TopTeam Desktop App.
- 9.0 – is the TopTeam Database Schema version required for this version of TopTeam Desktop App.
- 31May16 – is the release date of this TopTeam Desktop App.
Step 13. Select the newly created application and click Explore
Step 14. “TopTeamAppDownloadsSetup” folder opens, double-click “apps” folder
Step 15. “apps” folder opens, double-click “DesktopApp” folder
“DesktopApp” folder opens
Step 16. Extract the contents of TopTeamAutoUpdatePkg.zip file into a temporary location
Step 17. Paste the extracted contents in “DesktopApp” folder
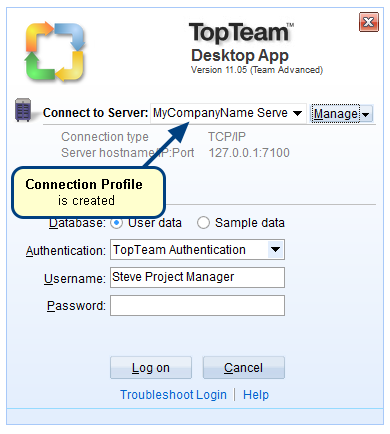
Step 18. Specify default Connection Profile for TopTeam Users
Step 18.1. Go to “apps” folder
Step 18.2. Configure DefaultConnectionSettings.cnf file using Notepad
Step 18.2. Enter details and save the file
Enter details as shown below:
- Name=Local Server #specify name of the connection profile. This will appear in the login dialog of Desktop App.
- Type=TCP/IP #specify TCP/IP or HTTP
- AppServerAddress=localhost #if you are using TCP/IP, specify the application server hostname/IP Address
- AppServerPort=7100 #if you are using TCP/IP, specify the application server port number
- WebServerAddress= #if you are using HTTP or HTTPS, specify the Website
- WebServerPort=80 #if you are using HTTP or HTTPS, specify the Port number
- ISAPIDllPath=topteamhttp/topteamhttp.dll #if you are using HTTP or HTTPS, specify the ISAPI DLL path
- UseSSL=0 #specify 1 if you are using secure web connection (ssl) and 0 to disable it
- UseCompression=1 #specify 1 to enable compression and 0 to disable it
Step 18.3. Alternately, you can export your current Connection Profile from TopTeam Desktop App and copy-paste its contents in the file above
18.3.1.Refer How to export a Connection Profile from TopTeam Desktop App article to export your current Connection Profile.
18.3.2. Open the exported file in Notepad.
18.3.3. Select All in Notepad and copy the selected text.
18.3.4. Open DefaultConnectionSettings.cnf file in Notepad.
18.3.5. Select All and delete the selected text first. The file should be empty after performing this step.
18.3.6. Paste the contents that you have copied in step 3 above into this file.
18.3.7. Save the file.
TopTeam App Distribution Website is successfully created
See Also
Revised: May 25th, 2018

